Friday

Great, Big, Wonderful World - new Spellbinders collection

Hi there friends!   Today I want to share a new Spellbinders collection from Sharyn Sowell with you. It's called Great, Big, Wonderful World....and its full of really fun and unique dies!

The whole collection can be seen HERE.

I used the Shapeabilities Peace Begins Here die.  This is a large, intricate die that cuts out a GORGEOUS piece.

I have a few cards to share with you today.  These are cards, but really they are so intricate and delicate that they would look pretty just sitting out on your desk.  In fact, mine is in my work office...its a pretty reminder.


Both cards were created the same way.  The card design is my own.  I wanted the beautiful silhouette to stand out from the card, so I created a little ledge at the bottom of the front of my card.


For the black die cut, I created a dramatic ink blended background to put behind the die cut piece.  It's almost glowing, and it is really pretty.  In order to keep the die cut attached, I cut a very small strip of card stock and folded it and tucked it behind the die cut, and attached to the card.  It gives the illusion of it floating in front of the card panel.

The other card was made the same way, but I made the card out of black card stock, and die cut the gorgeous die from a light turquoise card stock.  I used an ink blending brush to color the die cut in different areas.

That's all for today!   I've linked the entire collection below (affiliate links used at no cost to you...THANK YOU for your support!)

Great Big Wonderful World collection by Sharyn Sowell

Peace,
Jacquie

Sunday

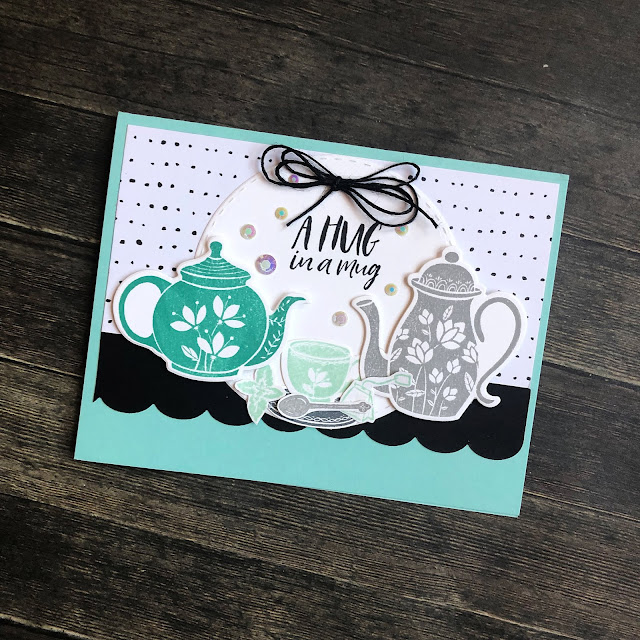
Coffee and Tea with Spellbinders FSJ Bloom Box

Hello friends!  I recently had a chance to play with the new Spellbinders + FSJ Bloom Box kit.  What is it you say?  Well, its a kit that comes with everything you need to make 4 cards, all you need to add is ink and adhesive!  The kits come with a great set of stamps, coordinating dies, paper, and embellishments, as well as an idea book with detailed instructions and photos of pre-designed cards!

I played with the November Bloom Box.  I made all the cards in the kit, and an extra one too!


The stamps included in the kit are red rubber cling and they stamp beautifully!  I used Catherine Pooler inks and then added some shading with colored pencils on this card. This card was my own design.


 These last four cards are variations of the designs and paper included in the Bloom Box.  I did not copy them exactly, but they came together really quickly.  I probably spent a total of an hour and half making these five cards!

There are several different boxes available too!

For more information on the Bloom Box, click HERE.  (affiliate links used - thanks for your support.)

Peace,
Jacquie

Saturday

Seasonal cards with Spellbinders Large Die of the Month

Hi there friends!  I had the chance to play with the new Spellbinder's Large Die of the Month kit for December recently.  This month it is a really cool interactive card die that makes it so easy to make a "WOW" type card.  Let's have a look!

The kit is a great value and includes a large interactive card die and a bunch of different accent dies.  You can see the whole kit HERE.


Since it is still holiday card making season for me, I made some cards with the holidays in mind...including a few Thank You cards.


The interactive card die makes it really easy to assemble these.  I used foil paper and cut out all my elements.  I adhered them together and that was it.  SIMPLE.  I can totally see using these dies with all sorts of patterned paper.


These cards all came together quickly using scraps of pretty foil paper.


Next,I took out some Holiday paper, including some leftover from the Spellbinders December card kit.  (The December kit is no longer available, but the extras are!  You can see them HERE)


Did you know that Spellbinders has all sorts of kits for different budgets?  If you are interested, check them out below. (affiliate links used at no cost to you)  Thank you so much for your support.

Small Die Kit

Large Die Kit

Amazing Paper Grace Kit

Card Kit of the month - This month is SUPER CUTE! I cannot wait to get mine!

Value Kits


That's all for today! Thank you so much for stopping by!

Peace,
Jacquie

Wednesday

Spellbinders Holiday Hoopla Black Friday deals

Hi there friends!  I'm sharing a quick post to say Happy Thanksgiving to all of you in the US, and to also share a great sale with you today.  Spellbinders has a huge Holiday Hoopla sale going on now! 
http://shrsl.com/1aoog

I wanted to quickly highlight some of my FAVORITE items from Spellbinders that are on sale for a great deal! (affiliate links used at no cost to you, thank you for your support)
Some of these items are MUST HAVES for your card making collection
You can see everything on the Holiday Hoopla sale HERE
And here are a few of my favorites this year.


1) Hemstitch edge dies - I love these dies, they create the prettiest edges for all your pieces.  They add a special something to each card.  You can see all of them HERE


2) 3D Vignette dies - These easy to assemble vignette die sets add an extra WOW to your cards.  They never will want to throw them away. You can see all the choices HERE


3) Monthly kits - Treat yourself to a kit or two!  The dies of the month kits are a great value, and they are really cute.  There is not a long term commitment and you can skip anytime you want.  Click HERE to see all the kits that are available.


You also can get  FREE SHIPPING and a  FREE layering stamp set with a $75 purchase.

That's all today...I hope you all have a nice Holiday weekend spent with family and friends.

Peace,

Jacquie


Friday

Spellbinders November 2018 Card Kit - Deer Santa

Hey friends,
I'm back today to share something really exciting and fun from Spellbinders!  It is the November 2018 Card kit...and OH MY, it is jam packed with all kinds of great stuff to make your holiday cards!

I may have gotten a little carried away making projects with this kit. :)


Here is where you can buy the kit: November Kit It is a great value at $35!  You get the cutest reindeer unicorn die set ever, a 6x6 pad of patterned paper, die cuts, layered chipboard stickers, cardstock, a stamp set, a roll of glitter tape, foam tape dots, strong adhesive and more!


You can check out the unboxing video here to see all the great stuff that you get, for a great price!


And now for some of the projects I made with the cute die set.  


This card, I die cut the reindeer in a soft pastel shimmer paper and made a non-traditional card. 


You can also cut the pieces out of white cardstock and color each one with Copic, or other markers, as I did here. 


This simple tag uses the patterned paper included in the kit for the different elements.  The options with this die set is unlimited!

That deer die set is just darling.  You also can alter this to just make a unicorn face.  All you need to do is trim off the ears and place them differently, and use the hat, without the brim as the unicorn horn! SUPER versatile!


In addition, Spellbinders offers all the extra items separately (excluding the dies) so if you need to replenish your supplies, you can!  Shop for all the extras here!

I also made several cards using just the extras.  Super easy for quick holiday cards!


This card features the stamp set included in the kit.  I stamped and colored each ornament with Copics.


These last three cards were made with all the fun pre printed items included in the kit.  They were super easy, and this time of year, easy works for me!  I dressed up the die cuts a bit using the enamel dots included in the kits, as well as added a bit of shading using Copic markers.  These cards really look professional!

I hope you love what I did with these as much as I did!  Please leave me a comment below!
Peace,
Jacquie

Thursday

Spellbinders and Fun Stampers Journey!

Hello friends!  I’m sharing something very exciting today with you! 


Fun Stampers Journey and Spellbinders are coming together on November 1st, 2018!  Now your favorite die cut company, Spellbinders Paper Arts,  has paired with Fun Stampers Journey to offer more hiqh quality stamps and dies.  Here are a few fun facts about FSJ!
1) FSJ stamps are made in the USA of deeply etched red rubber for a perfect impression every time.
2) Our thin metal dies are made of steel to give you clean cuts time and time again, without warping or dulling. And, they’re coated in FSJ green so they're easy to find!
3) We offer over 50 exclusive colors – matching cardstock, ink, ribbon and accessories makes creating easy!
4) Over 50% of our stamps have coordinating dies – no more fussy cutting!

You can see all of the products here 

And now for my projects.  I chose this gorgeous Adore Him stamp set and matching die bundle from Fun Stampers journey and paired it with the stunning Spellbinders Shapeabilities Grand Arch 3D Card Etched/Wafer Thin Die set.

Isn’t this pretty?  And it was really quite easy to make.  I simply die cut all the pieces from the Grand Arch 3D card dies, and used distress ink on the back panel to create a dramatic sky.  Then I stamped the images from FSJ in black, and die cut them with the coordinating dies.  I assembled the entire card in a matter of minutes.  This card is pretty simple, but packs a punch!

I couldn’t resist making a second card with this lovely set.  I made a long card for this one.  I inked up my background and then simply stamped the silhouettes of the three wise men approaching Bethlehem.  Again, a pretty easy card, that is very dramatic and lovely to give someone during the holiday season.

I hope you all will check out the new products from Fun Stampers Journey.  Each item is linked below (affiliate links used at no cost to you)

Thank you for stopping by!
Jacquie

Monday

Spellbinders Small Die of the Month Club

Hi friends,

Today I want to share a few projects I made with Spellbinder's Small Die of the Month kit for October.  But first, let me tell you about the club itself.  Spellbinders has several different monthly kits, one for each budget and taste.  The projects I am sharing today were made with the small die kit.

It is a great value! Membership Includes:
  • Exclusive Set of Small Versatile Dies that cut, emboss, deboss and stencil. Size is similar to Die D-Lites.
  • Project Inspiration: Each kit will feature project ideas with at least one detailed how-to instruction tutorial each month.
  • Member Benefits & Savings: Receive exclusive member pricing in the Spellbinders store. Plus receive access to deals, savings, and gifts - only available to members


My first project is a fun Fall themed card using the acorn die pieces and a piece of junk mail. I received the beautiful leaf flyer in my mail. I trimmed it down to A2 card size and set it aside.  The Spellbinders small die kit this month has some great fall themed dies.  I love the acorn.....its so beautiful and ornate.  I cut it out of gold paper and mounted it on top of the vellum strip I put on the card.  Easy and beautiful!

 For the second project, I made a cute place card setting that I plan on using at Thanksgiving.  I took a vellum envelope and cut the top off with a pinking shears. I then wrapped the envelope with some burlap ribbon, and added the "Give thanks" die to the ribbon.  I think this will look so pretty and elegant on my holiday table!


The last project uses a watercolor panel that I added a bit of gold to.  I added the greetings and acorn die cuts to the card and I have another quick and easy Thanksgiving card.

I hope you liked my projects today!  Thank you so much for visiting!

Peace,
Jacquie

New Spellbinders - A Charming Christmas

Hello there crafty friends and welcome back!  Tis the season for working on Christmas cards!  I know it is only early September, but getting a head start on cards is always a good idea as we all get so busy as we get closer to the Holidays.

I had the chance to play with some GORGEOUS dies from a new collection from Spellbinders called A Charming Christmas by Becca Feeken.  You can see the entire collection here.


  Today I made some very simple, yet elegant cards using the Shapeabilities Holly Jolly Christmas die set from Becca Feeken.  This die set is amazing with so many possible combinations.  For the cards I made, I first watercolored some card panels using Colorbursts to get a vibrant background.

On the red panel, I used gold ink, and I sponged some on to add some shine.  I then die cut the frame out of gold foil paper, and I also cut out the Merry Christmas die in the same foil paper.  I adhered with a liquid adhesive, and then mounted on a top folding card.


The second card was made the same way, except I used silver foil cardstock, and I cut out some holly leaves that are included with this set and added them to the frame.


For the last project, I cut out a card panel in white, and I left the center in.  I mounted it on a clear box, that holds a set of cards that I created to give to someone as a gift.

This die set is so easy to use, and helps you to create a lot of cards, very quickly.  I like that....after all, we all have so much going on during the holiday season.

Be sure to check out the entire new collection from Becca Feeken for Spellbinders.

Peace,
Jacquie

Wednesday

New Inked Messages from Spellbinders


Hi there crafty friends!  Today I’m sharing some cards with you made with NEW Spellbinders products as part of their new release, Inked Messages from Stephanie Low.  These beautiful Tattoo inspired drawings are sure to spark your creativity!

You can see all the full collection here at:
Stephanie Low Inked Messages Collection
Spellbinders
(affiliate links used at no cost to you)

I created two projects for this release.

The first one features the Fare Thee Well stamp and die set from Spellbinders.


  To make this card, I stamped the feather images multiple times and the horseshoe “good luck” image once.  I colored them all with Copic Markers and added fun details with a white gel pen.  I used a rainbow of colors, because rainbows are good luck, right?

I used the Spellbinders Hemstitch die circles to cut an inset circle on the card panel.  I arranged my feathers in rainbow order and glued them down.  I popped up the good luck sentiment inside the circle.  To finish off the card, I mounted my card panel on red cardstock, and added rainbow coordinating jewel embellishments to the project.


For my second project, I used the One day at a Time stamp and die set from Spellbinders.  I stamped and colored the pocket watch image using Copic markers.  I used the coordinating die cut to cut it out.  On my card panel, I lightly sponged some gray ink on, using a dotted stencil  I added a little bit of ribbon on the card, and popped up my image on the top.  I finished it up by stamping the greeting over the top of the stenciling.


That’s it for today!  I hope you like my cards and I encourage you to check out this fun new collection from Spellbinders here.

Thanks for stopping by,

Peace,
Jacquie


Thursday

Altenew Garden Treasure - AECP All About Layering 2

Good morning friends!

Today I'm sharing the latest projects I made for the Altenew Educator Certification Program.  These projects were inspired from what I learned in the All About Layering 2 class at Altenew Academy.

First let me explain a little bit about this class.  Basically, all the lessons were how to layer some of the newer Altenew layering sets. 

One thing I learned is how forgiving many of these sets are. 

While it is possible to achieve perfection on each layer, it's not always necessary because sometimes, the art is in the imperfections.  Does that make sense? 

Now, on to today's projects.


I used another all time favorite Altenew set, Garden Treasures, for these cards.   I started as I usually do by stamping several of each of the elements on cardstock, and then cutting them out.  I stuck to the color palette from the Glacier Caves ink collection.  I stamped some of the flowers starting with the lightest color, Arctic, and then I stamped some using the next lightest, Caribbean Sky.  This way, I feel I got more depth, and while the flowers all coordinated beautifully, the colors were not all the same value.  Some are darker, and some are lighter.  I experimented with different variations on the same color scheme, and I love how they turned out.  Instead of using black or just a color as my outline, I decided to stamp in Versamark and use Altenew Antique Gold Embossing Powder for my outlines.  For the smaller flowers, I just left them white, I added no color to the embossed outline.  The leaves were stamped using the Green Fields collection.  I did use the coordinating dies for cutting all of these out.


For this card, I wanted a simple, elegant backdrop for my flower arrangement.  I used the Altenew dotted scales cover die.  I probably overuse this die, its a favorite.  It's just so pretty, and such an easy, effective way to jazz up that background!

For the greeting, I simply stamped in Versamark on to a scrap of white cardstock, and embossed with Antique Gold.  I really did not want to cover much of my flowers up (they are so pretty), so I trimmed down the piece to make a simple banner to house my greeting.


I had enough flowers left over from my stamping so I made a second card.  The background here is a bit different...I first used a blending sponge to create an ombre effect using the Altenew inks (they blend like butter!)  Then I covered that with the Watercolor stripes cover die. (this is another die I use constantly, goes with everything!)  I stamped my greeting on the stripe above my floral arrangement.

Supplies Used
Altenew Stamp Sets: Garden Treasure, Beautiful Day
Altenew Coordinating dies: Garden Treasure
Altenew Cover Dies: Watercolor stripes, Dotted Scales
Altenew Ink Collections: Glacier Caves, Green Fields
Altenew Embossing Powder: Antique Gold
Embellishments: PPP Droplets

Thanks for joining me today.  I am really enjoying the classes at Altenew Academy.  While I am not a new stamper, I am finding all sorts of inspiration in these self paced classes!  I hope you enjoy my posts....if you do, please leave me a comment.  I love to hear your thoughts.

Peace,
Jacquie

Tuesday

Winner! Spellbinders Blog Hop


Just popping in here to announce the winner of the $25 Gift card to Spellbinders from the Hop last week.
The winner is:


Blogger Karen Lambert said...
Absolutely beautiful....as always.
May 16, 2018 at 11:23 AM
Delete


Congratulations Karen, please contact me for your prize!

Monday

Altenew Vintage Flowers - AECP All About Layering 1


Hi there Crafty friends!  Today is my first post as a participant in the Altenew Education Certification Program.  To say I merely "love" Altenew and their stamps would be an understatement.  I have been a stamper for a very long time, and I've also taught many stamping and scrapbooking classes over the last 20+ years.  Several years ago, I stopped stamping.  We were building a new house, life was busy, etc.  I always felt like I needed to get back to it, but I was putting it off.  I happened to be looking at YouTube for a "how to" video involving something else, and I came across a video from Jennifer McGuire showing these beautiful layered roses being made using a MISTI stamping tool.  I was mesmerized...these stamps (and that tool) were AMAZING!    By the end of the week, I had ordered both items.  It was April 2014, and I had discovered Altenew for the first time!  I really wanted the Vintage Roses set that Jennifer had used, but it seemed to be out of stock everywhere, so I ordered the Vintage Flowers set....and the rest, as they say, is history!

I thought it only fitting to use my very first Altenew stamp set for my first project in the AEC Program.

ALTENEW VINTAGE FLOWERS - ALL ABOUT LAYERING CLASS 1


I started this card by stamping the branch included in the set on a piece of 4 1/4 x 5 1/2 inch Bristol Smooth cardstock. I used my MISTI stamping tool for this to get good impressions, and I stamped twice because I wanted the branch a bit darker.  Then I took the base layers of the small flowers and arranged them all over the branch, and then closed the lid of my MISTI and picked up the stamps all at one time.  I used the lightest colors on the base layers.  I arranged the top layers on the flowers, and stamped them all at one time using a darker, coordinating color from the Cherry Blossom Ink collection.  For the larger blooms, I stamped each layer out carefully on some scrap cardstock and cut them out.  I fussy cut mine, but there are coordinating dies available for this set, I just do not have them yet.

I placed my cut out blooms on the card and then took and arranged the leaf clusters on the card to see where they would look best.  I stamped all three layers of the leaves using the Green Fields ink collection.  I love the gorgeous contrast the greens give this card!  I used some foam tape to pop up my large blooms on the card, and then added a greeting in the bottom left corner.  I finished off the card with some pretty jewels as embellishments!


Supplies Used

Stamps:  Altenew Vintage Flowers and Altenew Peony Spray (sentiment)
Embellishments : Pearl White Jewels

Lastly, I really enjoyed this class.  It was a great refresher on how to use these beautiful layered sets!  I was really happy to dust off my very first Altenew set and make a pretty card!  I highly recommend any of Altenew's classes - you can click here to find out more about the Altenew Academy!

Thank you so much for joining me today!  If you like what I've done, please be sure to leave me a comment, and also click follow to see future projects as I embark on my Altenew Educator series journey.

Peace,
Jacquie